
Deploying React & Node.js App using GitHub Actions CI/CD
Aneh Thakur
. 5 min read
In this tutorial, I will explain to you how we can deploy or React/Node.js application using CI/CD pipeline with Github actions.
Before we start creating a CI/CD pipeline we need to know about what it is and the benefits of CI/CD.

What is CI/CD?
CI/CD stands for Continuous Integration and Continuous Delivery. It is a software development practice where developers regularly merge their code changes into a central repository, after which automated builds and tests are run. By doing so, you can detect errors quickly, and locate them more easily.
What are the benefits of CI/CD?
There are many benefits of CI/CD, some of them are:
- It helps to reduce the time to market.
- It helps to reduce deployment failures.
- It helps to increase the deployment frequency.
- It helps to improve the stability of the application.
- It helps to improve the quality of the application.
What are GitHub Actions?
GitHub Actions is a feature of GitHub that allows you to automate your software development workflows. It is a CI/CD tool that is tightly integrated with GitHub. It is a great tool for automating your software development workflows.
If you want more info visit this link: GitHub Actions.
Prerequisites
To use this tutorial, you will need the following:
- Good knowledge of GitHub
- Basic knowledge of Node.js and React (I am using next.js for this tutorial)
- A live server where you can host your site (I am using Digital Ocean for this tutorial. You can use my referral link and get $100 free for hosting).
Now we can start the main and interesting part of the blog step by step.
Step 1. Create your application for this tutorial I am using Next.js you can create express or react.js projects.
Open terminal/cmd and go to the location where you want to create the project.
Command to create a new Next.js application.
npx create-next-app@latest
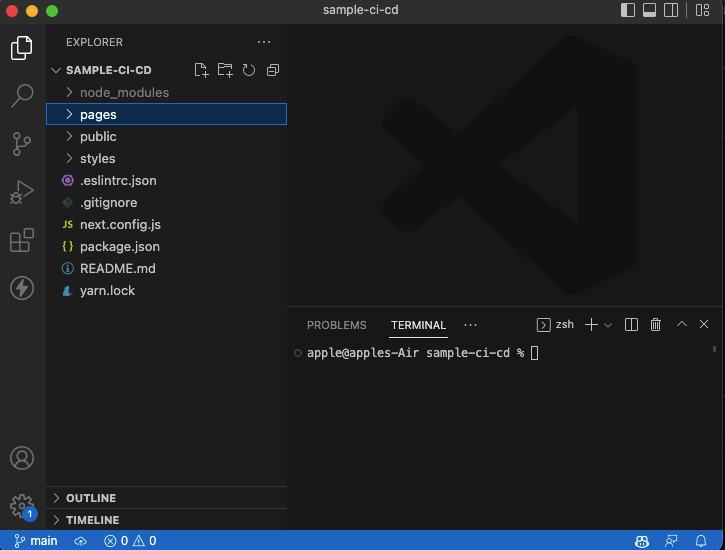
Once your project is ready you can open it on VScode.
Step 2. Create a new repo on Github and publish your project.
My sample project link:- Sample-ci-cd
Step 3. Now we can set up or server where we can publish or project. If your server is not set up then install Node.js, and NGINX on your server.
Login to your server via terminal
sudo apt-get update

// Command to install nginx
sudo apt install nginx

curl -fsSL https://deb.nodesource.com/setup_16.x | sudo -E bash -

// After above command
sudo apt-get install -y nodejs
Now Nginx and node are installed in the server you can type your IP address in the browser.
To check the node version type the below command.
node -v
Step 4. Create a new user account for the server. Run the below command to create a user
adduser gitcicd
when you press enter you ask to create a new password and confirm.
Now we need to give permission to gicicd user so he can create a directory and perform an action. To give permission type the below command.
sudo usermod -aG sudo gitcicd
Give user permission to read and write in the directory
sudo chmod -R 777 /var/www/html/
Now change the login user to gitcicd using below command
su - gitcicd
Create a new folder inside HTML. When you try to create a folder it may ask for a password for the current login user enter a password and it will create a directory.
# Process to create directory
cd /var/www/html

# make directory
mkdir gitsample

# go to directory
cd gitsample
In the gitsample folder, we can put Github actions.
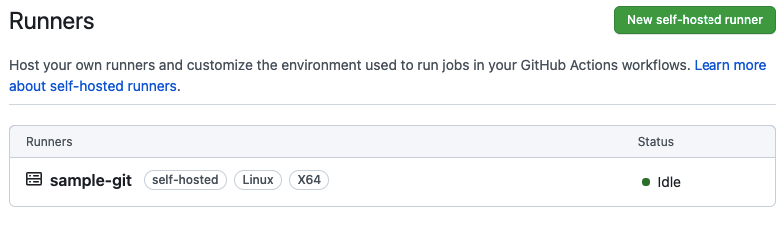
Step 5. Now we can install Github action runner. Go to your GitHub repository ->settings -> Actions -> Runners
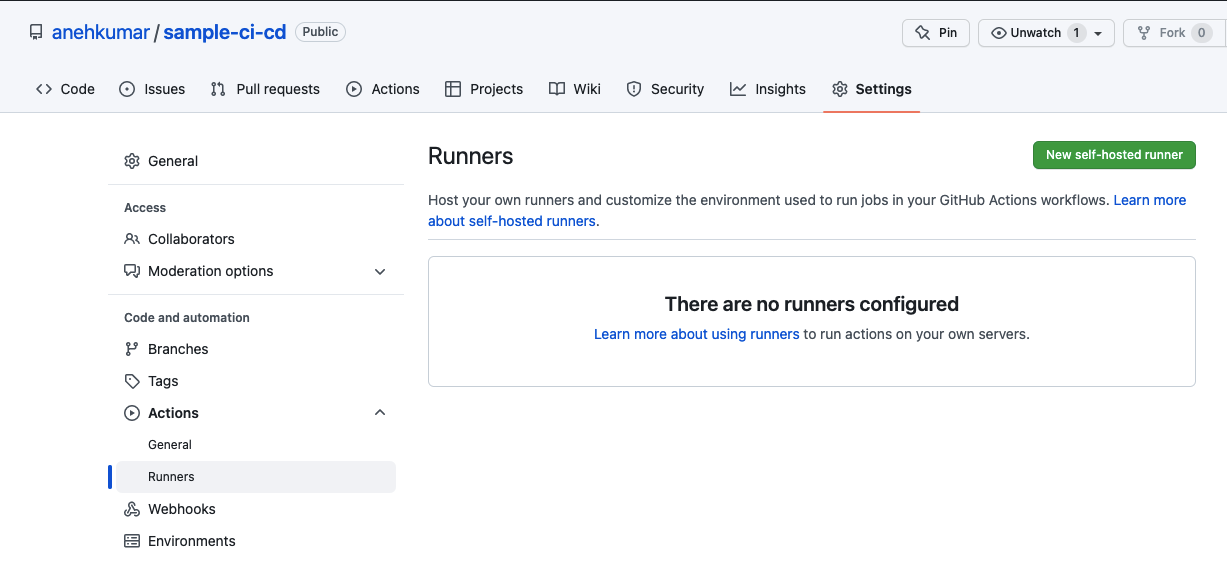
Click on New self-hosted runner and select Linux as os and Architecture x64.

Now we need to download the runner package. Go to the terminal and check you are inside your new directory in my case (my-site). Run download command with sudo. The below command is for reference you can copy the command from the git page as shown in the above screen shot.
sudo curl -o actions-runner-linux-x64-2.296.2.tar.gz -L https://github.com/actions/runner/releases/download/v2.296.2/actions-runner-linux-x64-2.296.2.tar.gz
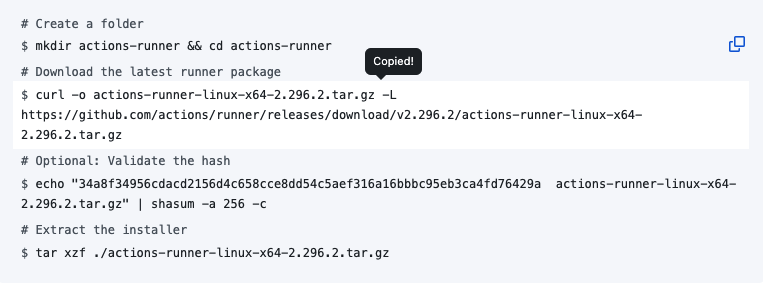
Once the download is complete you can extract the file using the extract command. If you get an error add sudo in front of the command.
sudo tar xzf ./actions-runner-linux-x64-2.296.2.tar.gz
If you get a permission error run the below command.
sudo chmod -R 777 /var/www/html/gitsample
Run configuration command as mentioned in Github runners.
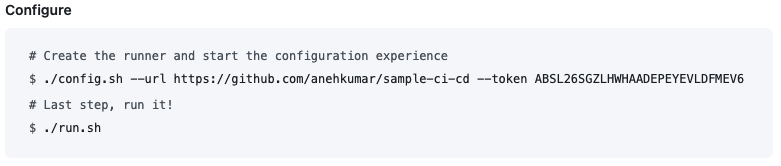
When you run the command it will ask to give a runner name you can give your username as a runner (sample-git). And after this, it will ask for the folder name and leave it as default (_work).
Now run these commands
# install runner
sudo ./svc.sh install

# start service
sudo ./svc.sh start
Now go to GitHub and check your runner is created.
Step 6. Now we can config NGINX to display our website. You can create a new config file or update default file.
// Go to Nginx Folder
cd /etc/nginx/sites-available

nano type_your_domain.com
And paste the below code.
# Default server configuration
#
server {
    client_max_body_size 2000M;
    listen 80;
    listen [::]:80;


    # Location of your project
    root /var/www/html/gitsample/_work/sample-ci-cd/sample-ci-cd;


    # Add index.php to the list if you are using PHP
    index index.php index.html index.htm index.nginx-debian.html;


    server_name your_domain.com;

    location / {
        proxy_set_header X-Forwarded-For $proxy_add_x_forwarded_for;
        proxy_set_header Host $http_host;
        proxy_set_header X-NginX-Proxy true;
        #Add your IP address and port
        proxy_pass http://YOUR_IP:3000/;
        proxy_redirect off;
        proxy_http_version 1.1;
        proxy_set_header Upgrade $http_upgrade;
        proxy_set_header Connection "upgrade";
        proxy_redirect off;
        proxy_set_header X-Forwarded-Proto $scheme;
    }


    # deny access to .htaccess files, if Apache's document root
    # concurs with nginx's one
    #
    location ~ /\.ht {
        deny all;
    }
}
When you paste this code add your domain, IP address and project location check the comment in the above code. After this, we need to enable this configuration.
sudo ln -s /etc/nginx/sites-available/my_domain.com /etc/nginx/sites-enabled/my_domain.com
Restart the Nginx server.
sudo systemctl reload nginx
Install pm2 in the server to run our project
sudo npm install pm2 -g
We will use this later.
Step 7. Now we can create our GitHub workflow. Go to your project and create a .github folder and inside the folder create a workflows folder. Now inside workflow create the node.js.yml file. In the node.js.yml file, we can write commands which we want to execute when the code is transferred to the server.
# node.js.yml file
name: Node.js CI


on:
  push:
    branches: [ "main" ]
  pull_request:
    branches: [ "main" ]


jobs:
  build:


    runs-on: self-hosted


    steps:
    - uses: actions/checkout@v3
    - name: Use Node.js ${{ matrix.node-version }}
      uses: actions/setup-node@v3
      with:
        node-version: ${{ matrix.node-version }}
        cache: 'npm'
    - run: |
        npm i
Save this file and commit the change. Now when you commit this go to the terminal you will find the _ work folder inside that folder you can find your project and see your files are copied and node_module folder is there.

Now run your project with pm2 using this command.
pm2 start npm --name "project" -- start
Check your project running on the browser. Now we need to update node.js.yml
file to add commands so when ever we push any change it will install dependency and restart pm2 server.
name: Node.js CI


on:
  push:
    branches: [ "main" ]
  pull_request:
    branches: [ "main" ]


jobs:
  build:


    runs-on: self-hosted


    steps:
    - uses: actions/checkout@v3
    - name: Use Node.js ${{ matrix.node-version }}
      uses: actions/setup-node@v3
      with:
        node-version: ${{ matrix.node-version }}
        cache: 'npm'
    - run: |
        npm i
        pm2 restart 1
That's it I hope you like this post.
More Stories from
Get Started with TypeScript: A Beginner's Guide with Code Samples
TypeScript is a popular, powerful programming language that is a superset of JavaScript. If you're new to TypeScript, this beginner's guide is the perfect place to start. With clear explanations and code samples, you'll learn the basics of TypeScript and

TypeScript vs TSX: Understanding the Differences
This article delves into the key differences between TypeScript and TSX, two programming languages used for developing complex web applications. From syntax and static typing to React integration and code organization, learn which language is best suited

Learn about the different types of React hooks with code examples
React hooks are a powerful feature that allow you to use state and other React features inside functional components. In this tutorial, you will learn about the different types of hooks available in React, and see code examples of how to use them in your

A step-by-step guide to deploying a ReactJS app online
Learn how to deploy your ReactJS app to the internet with this comprehensive tutorial. From setting up a hosting platform to building and uploading your code, we'll cover all the steps you need to take to get your app live. Whether you're a beginner or an
What is React context API?
React Context is a way to share values that are considered "global" for a tree of React components, such as the current authenticated user, theme, or preferred language. It allows you to avoid prop drilling, or the passing of props through multiple levels